 Pin this
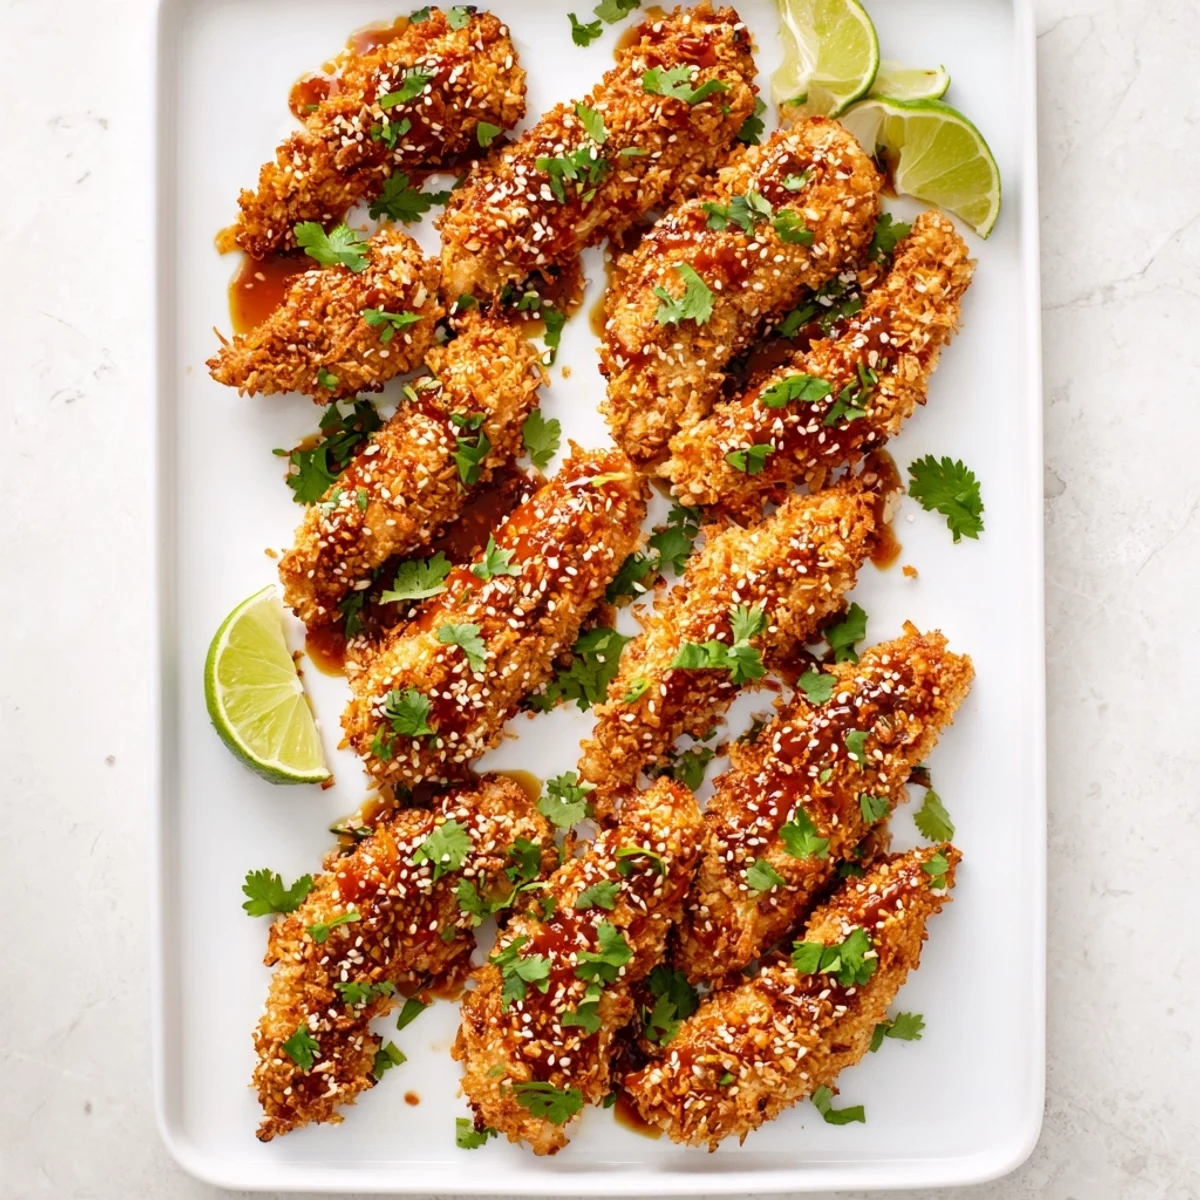
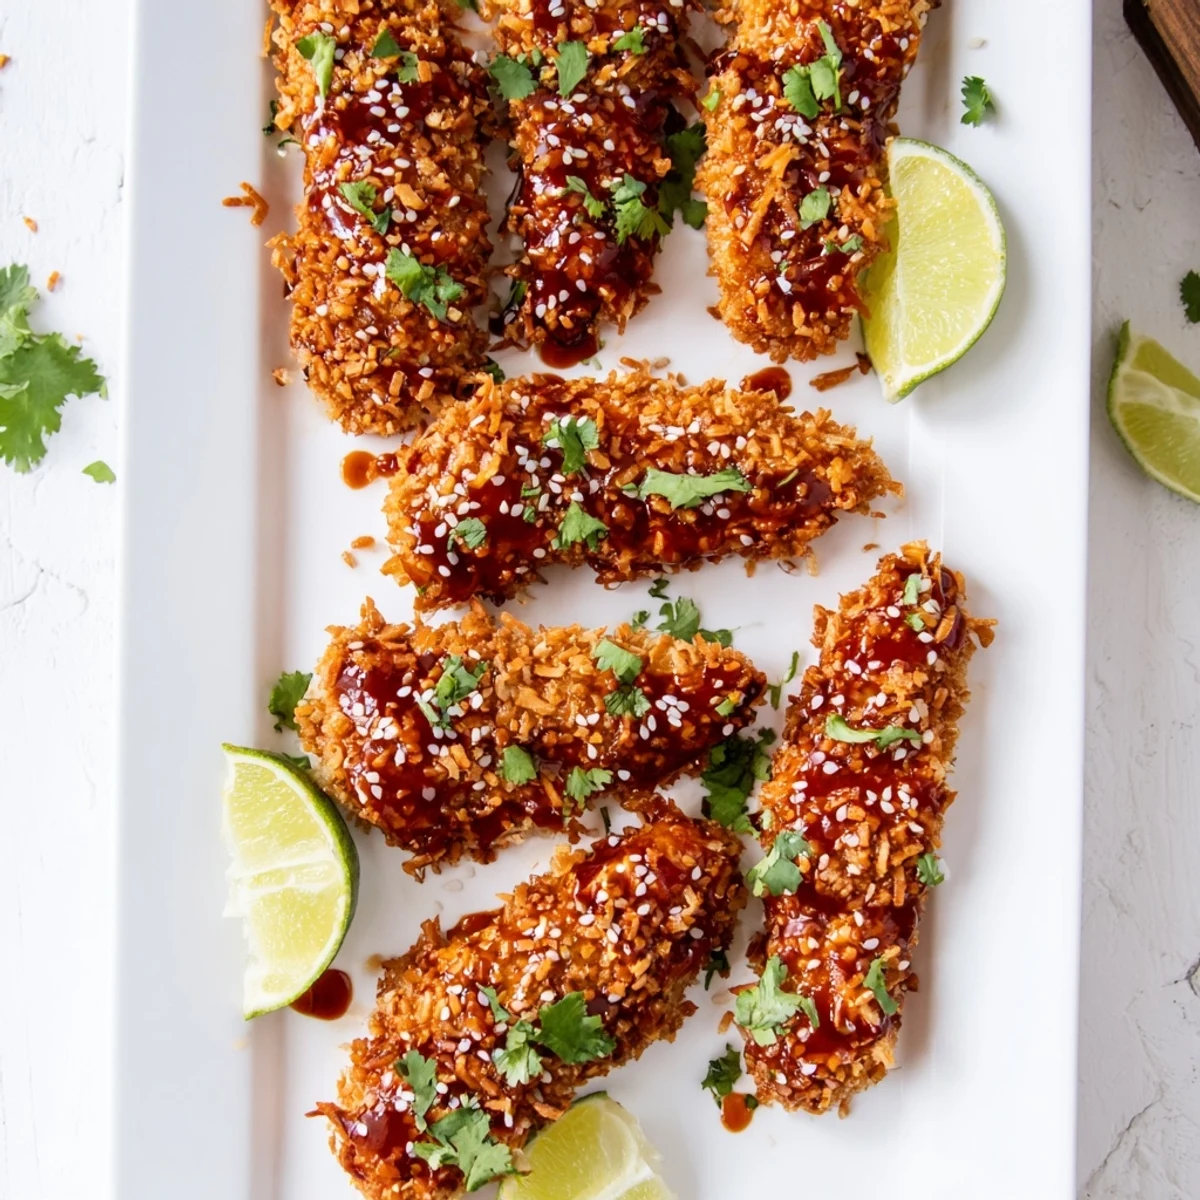
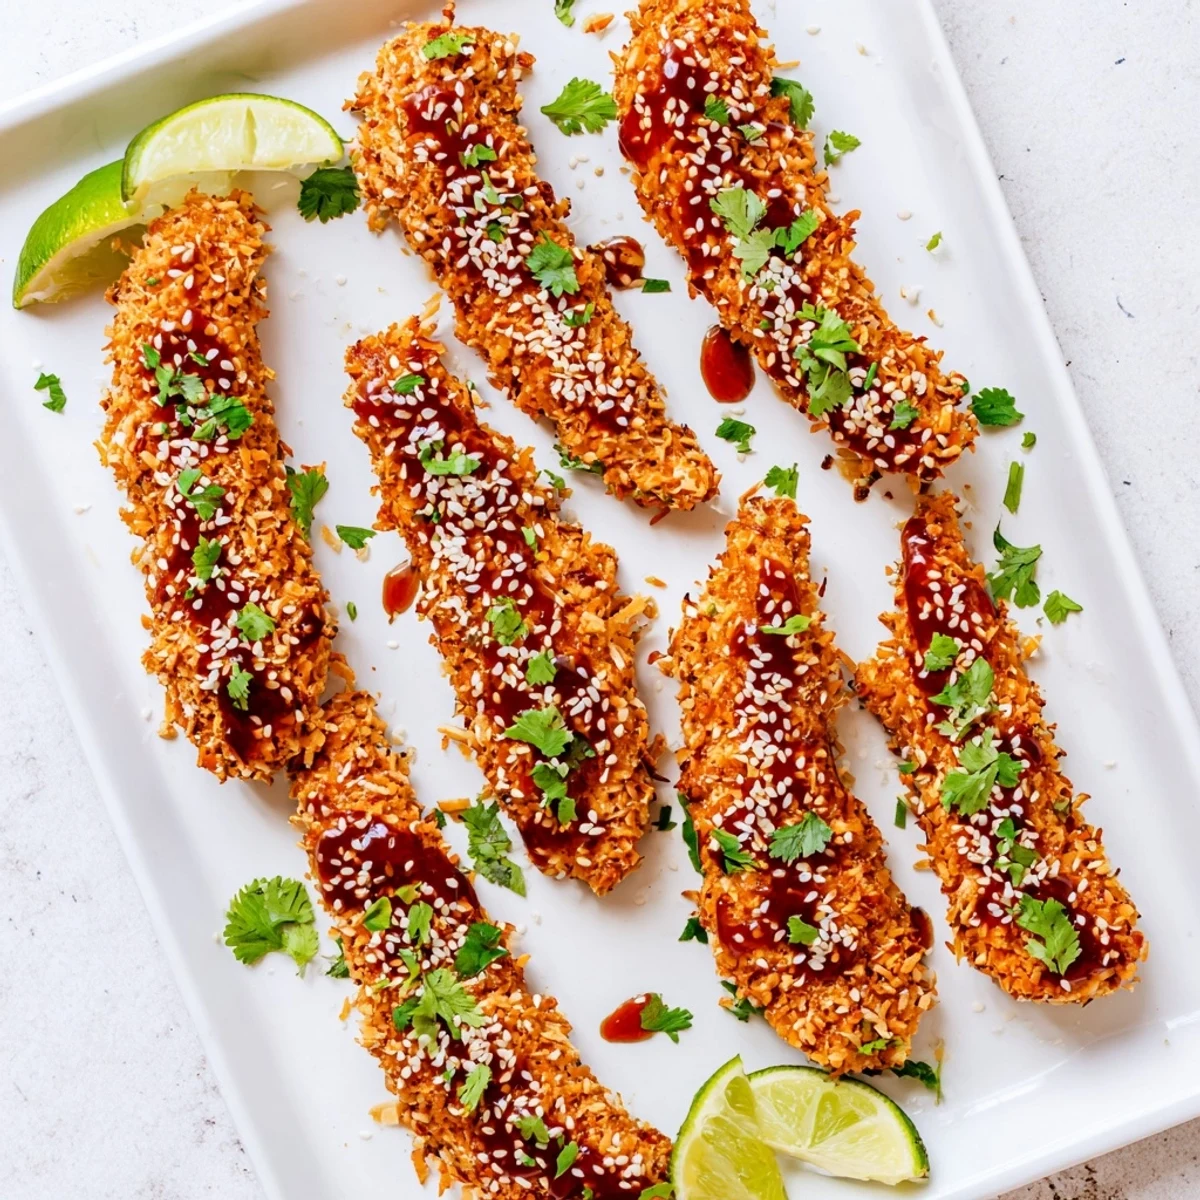
 These chicken fingers start with tender strips coated in a crispy panko and coconut breading, baked until golden. The magic happens when they're tossed in a homemade sticky Thai sauce combining sweet chili, soy sauce, honey, rice vinegar, sriracha, garlic, ginger, and fresh lime juice. The result is perfectly crispy chicken with a glossy, sweet-spicy coating that balances heat with sweetness. Ready in 50 minutes, these work beautifully as party appetizers, game day snacks, or a fun main dish the whole family will love.
The first time I made these sticky chicken fingers was during a marathon cooking session with my brother. We were supposed to be meal prepping for the week, but ended up eating half the batch standing at the counter. The combination of that crunchy coconut coating hitting the sweet spicy sauce became instant kitchen chaos.
Last summer I brought these to a neighborhood potluck and watched them disappear in ten minutes flat. My neighbor asked for the recipe before even finishing her first piece. Something about that sticky glaze makes people gravitate toward the platter like moths to a flame.
Ingredients
- Chicken tenders: Fresh tenders work best here but breast strips cut into even pieces do the job perfectly
- Salt and pepper: Dont skip this simple seasoning step it builds the flavor foundation from the inside out
- All purpose flour: Creates the first layer of coating that helps the egg adhere to the chicken
- Large eggs: Room temperature eggs coat more evenly and create better breading adhesion
- Panko breadcrumbs: These Japanese breadcrumbs create that extra crispy texture regular crumbs cant match
- Shredded coconut: Optional but adds such a lovely subtle sweetness and extra crunch factor
- Sweet chili sauce: The base of our glade brings that signature Thai sweetness and mild heat
- Soy sauce: Adds the necessary umami depth and saltiness to balance all the sweet
- Honey: Natural sweetness that helps create that beautiful sticky coating on the chicken
- Rice vinegar: Cuts through the richness and brightens the entire sauce
- Sriracha: Adjust this based on your heat tolerance but dont skip it entirely
- Fresh garlic: Minced finely so it distributes evenly through the sauce without any harsh bites
- Fresh ginger: Grated fresh brings a zing that ground ginger simply cannot replicate
- Fresh lime juice: The acid that wakes up all the flavors and keeps the sauce from being cloying
- Fresh cilantro: Sprinkle generously for that pop of fresh herbal contrast
- Toast sesame seeds: They add nuttiness and beautiful visual appeal to the final dish
- Lime wedges: Serve on the side so guests can add an extra squeeze if they love that bright citrus
Instructions
- Get your oven ready:
- Preheat that oven to 220°C (425°F) and line a baking sheet with parchment paper. Give it a light coat of oil to prevent any sticking situations.
- Season the chicken:
- Pat those chicken strips completely dry with paper towels. Season them generously with salt and pepper on all sides.
- Set up your breading station:
- Arrange three shallow bowls in assembly line fashion. Flour goes first then beaten eggs then the panko mixed with shredded coconut if youre using it.
- Coat the chicken:
- Dredge each strip in flour shaking off excess then dip in egg letting excess drip off. Finally press into the panko mixture to coat evenly and place on your prepared sheet.
- Bake until golden:
- Spray or brush the coated chicken lightly with oil. Bake for 20 to 25 minutes turning once halfway through until theyre golden brown and cooked through.
- Make the magic sauce:
- While chicken bakes combine sweet chili sauce soy sauce honey rice vinegar sriracha garlic ginger and lime juice in a small saucepan. Simmer over medium heat for 3 to 4 minutes stirring until slightly thickened.
- Coat and serve:
- Toss those hot baked chicken fingers in the sticky Thai sauce until every piece is beautifully coated. Arrange on a platter sprinkle with cilantro and sesame seeds and serve with lime wedges.
 Pin this
 My daughter now requests these for her birthday dinner every year. That moment when she first tried them and her eyes lit up at the perfect balance of sweet and spicy remains one of my favorite kitchen memories.
Making Them Extra Crispy
For next level crunch try air frying the breaded chicken at 200°C (400°F) for 12 to 15 minutes. The circulating air creates an even crisper exterior that stands up beautifully to the sticky sauce.
Simple Variations
Substitute agave syrup for honey to make this vegan friendly and use plant based chicken strips. Chopped peanuts sprinkled on top add another layer of crunch and protein.
Perfect Pairings
These chicken fingers shine alongside jasmine rice or a crisp Asian slaw to cut through the richness. The contrast of cold crunchy vegetables with hot sticky chicken creates the most satisfying bite.
- Set up a sauce bar with extra sriracha for heat lovers
- Make double the sauce and save some for dipping
- Prep everything in advance and bake just before serving
 Pin this
 These sticky chicken fingers have become my go to for feeding a crowd. Something about that combination of crunch and sweet heat just makes people gather around and stay a while.
Recipe Questions & Answers
- → Can I make these chicken fingers ahead of time?
-
Yes! Bread the chicken up to 24 hours in advance and store refrigerated. Bake fresh when ready, or bake completely and reheat at 200°C for 5-8 minutes. Toss in sauce just before serving to maintain crispiness.
- → How can I make this dish spicier?
-
Increase the sriracha to 2 tablespoons, add a teaspoon of chili garlic sauce, or mix red pepper flakes into the sauce. You can also serve with extra sriracha on the side for those who enjoy more heat.
- → What can I serve with Thai sticky chicken fingers?
-
These pair wonderfully with jasmine rice, Asian slaw, cucumber salad, or steamed dumplings. For appetizers, serve alongside spring rolls or potstickers. Lime wedges and extra cilantro make perfect fresh garnishes.
- → Can I air fry instead of bake?
-
Absolutely! Air fry at 200°C (400°F) for 12-15 minutes, shaking halfway through. The air fryer creates excellent crunch and uses less oil. Work in batches to avoid overcrowding for best results.
- → Is the coconut in the breading necessary?
-
The shredded coconut adds subtle sweetness and extra crunch, but it's optional. For a classic version, simply use 160 g (1 1/2 cups) of panko breadcrumbs without coconut. The coating will still be deliciously crispy.
- → How do I store leftovers?
-
Store cooled chicken in an airtight container for up to 3 days. Reheat in a 200°C oven for 8-10 minutes to restore crispiness. The microwave will make them soggy, so the oven or air fryer is recommended.
