 Pin this
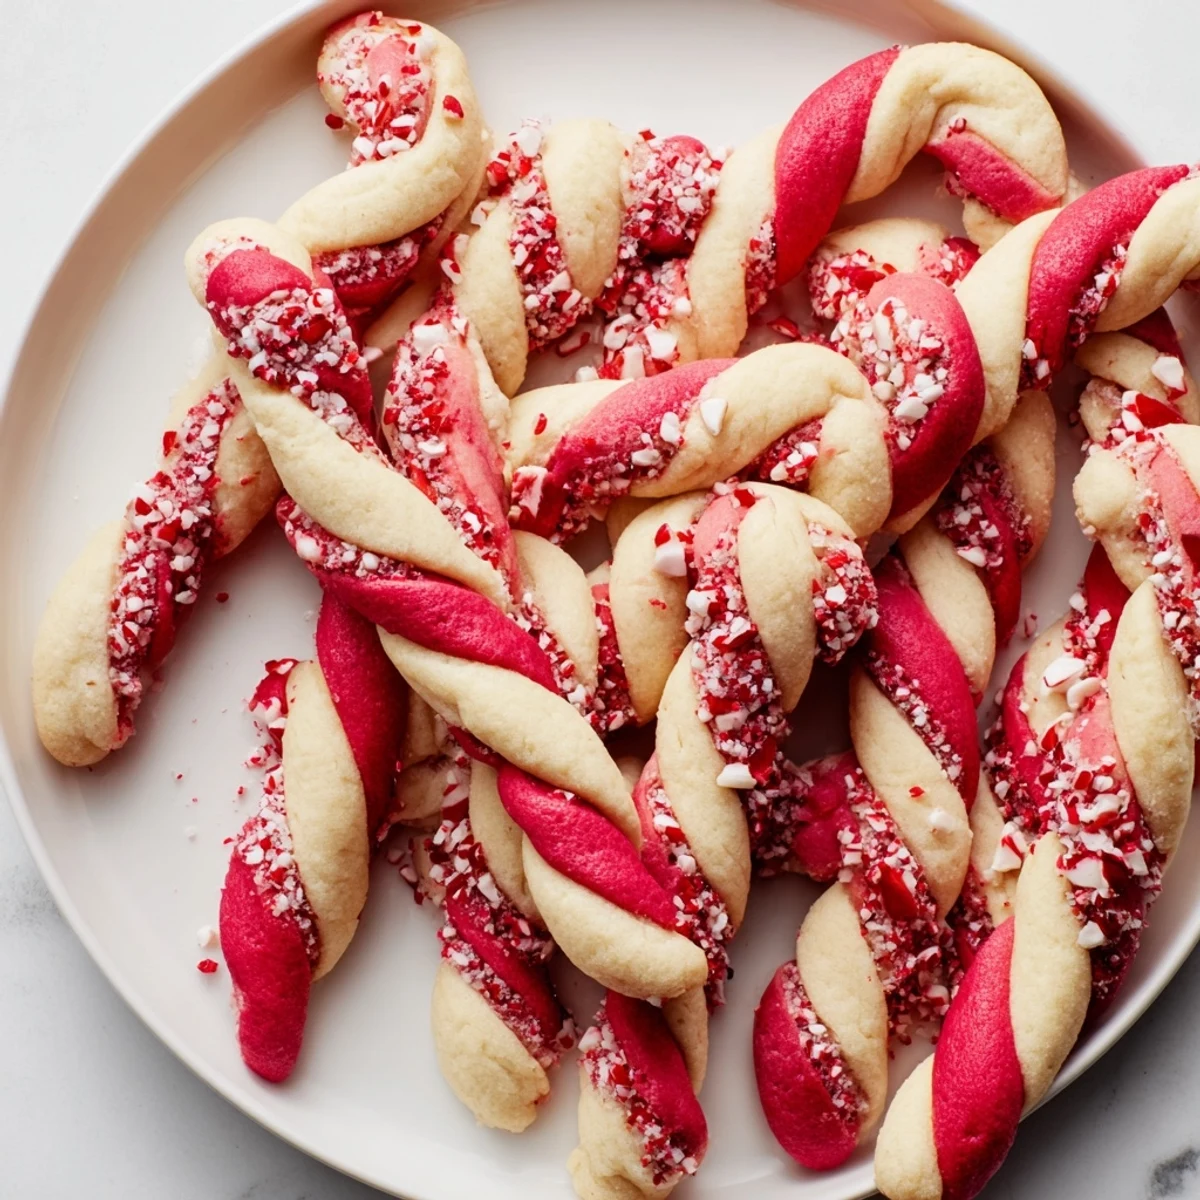
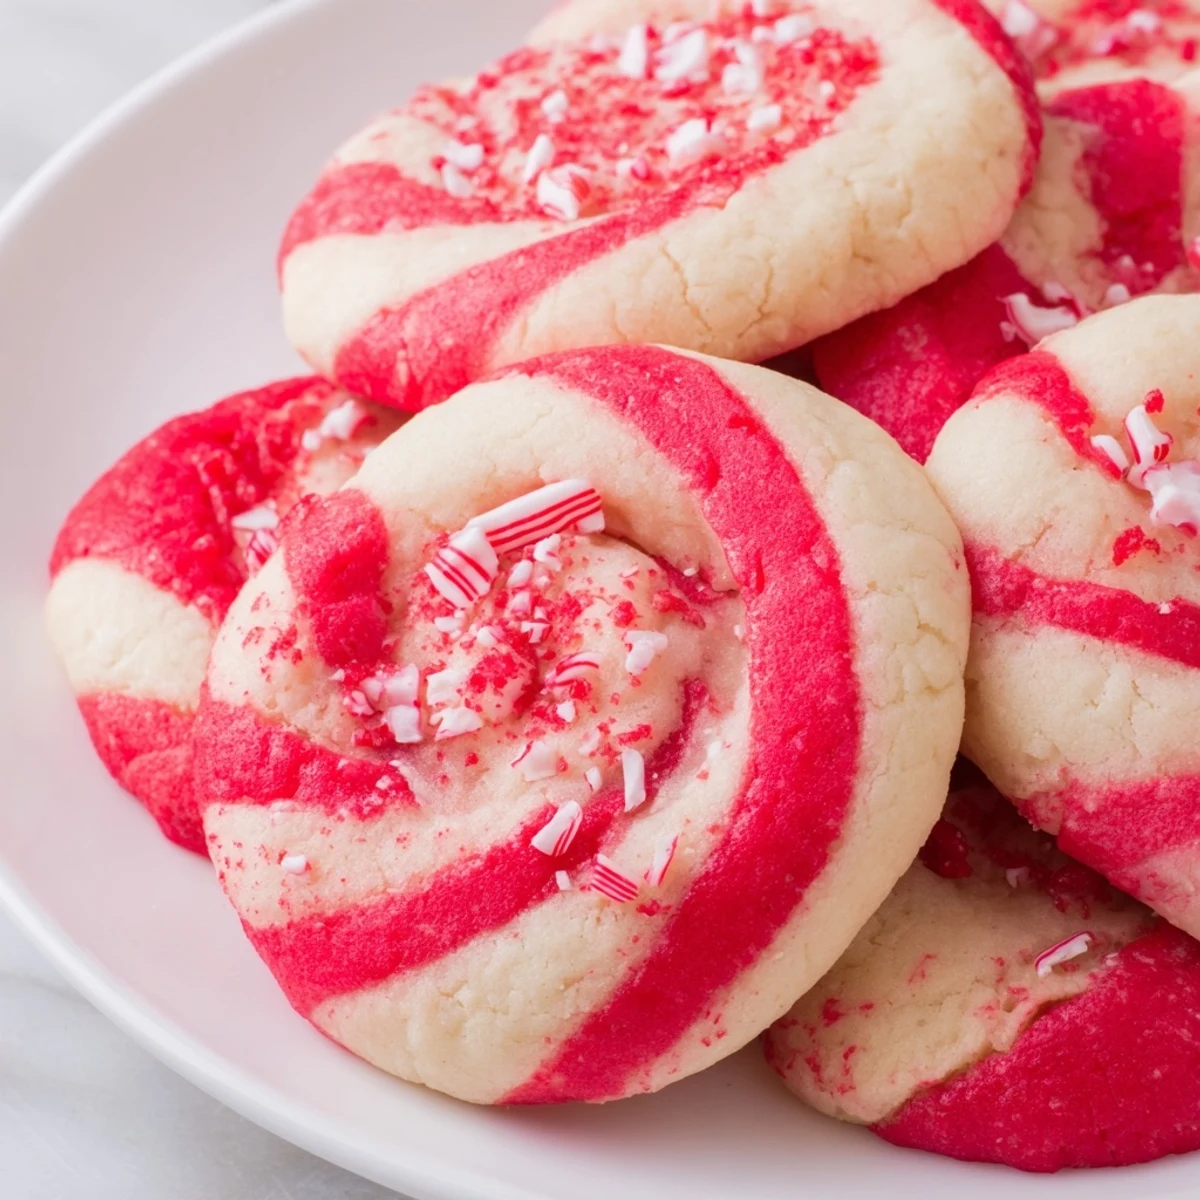
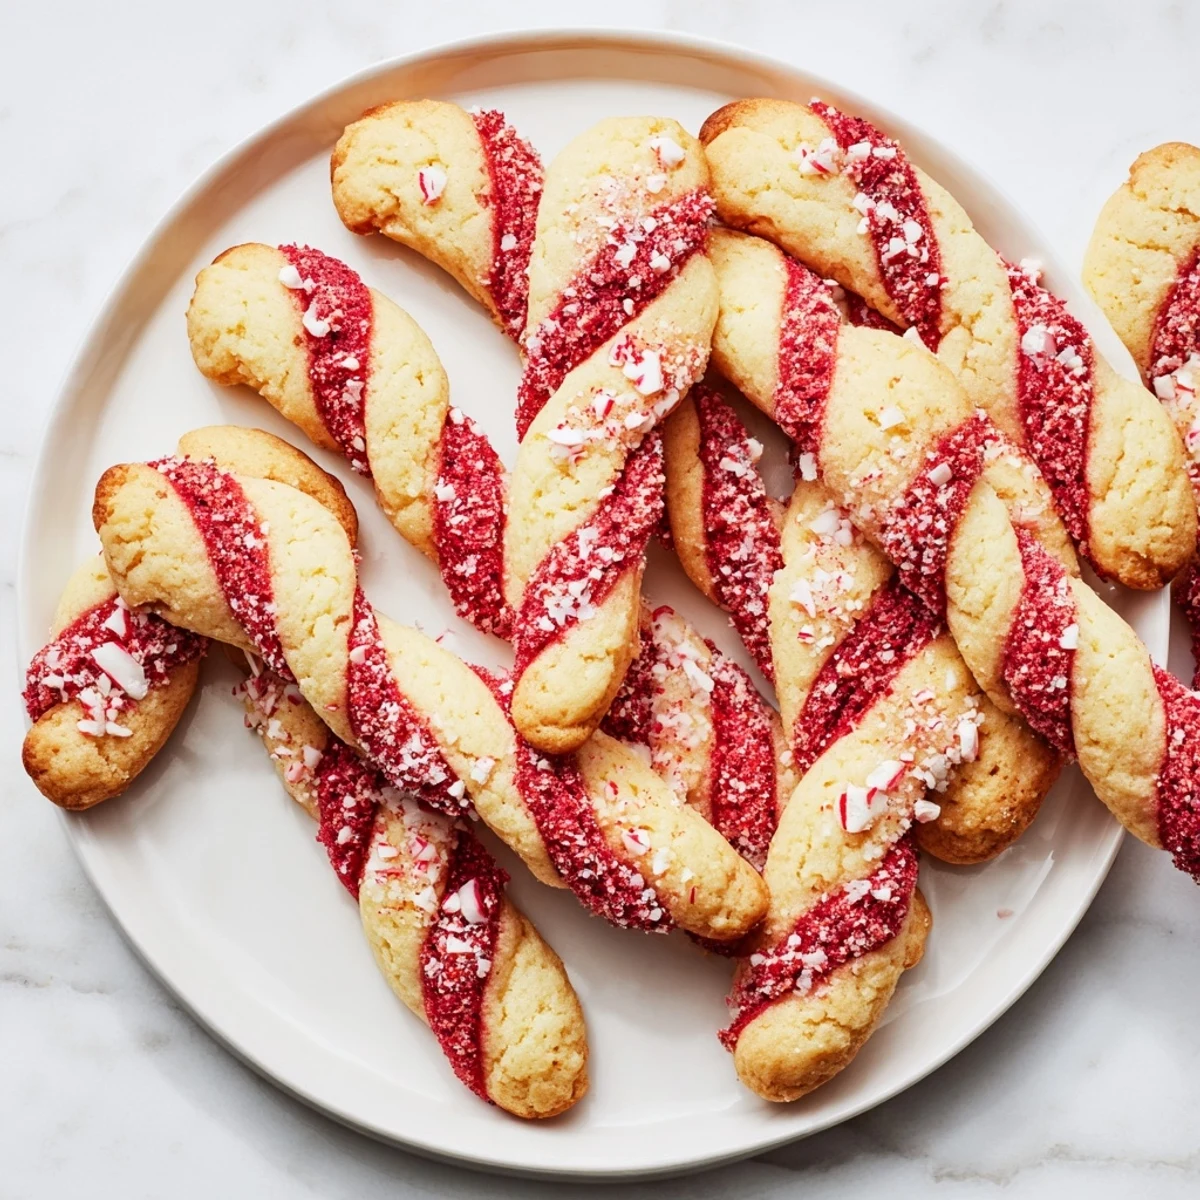
 These buttery, peppermint-infused doughs are divided and tinted, then twisted together into festive swirls. After chilling and baking, they offer a tender texture enhanced by a subtle mint burst, perfect for holiday treats. Crushed peppermint candies add a crunchy, aromatic finish. Preparation is straightforward, requiring simple mixing, chilling, and shaping steps, making them a joyful addition to seasonal celebrations.
I still remember the December morning my grandmother taught me to make peppermint twist cookies in her cozy kitchen. She'd pull out this exact recipe every year, and I'd watch her twist the red and white dough together with such care, like she was creating little edible candy canes. Now, whenever I make them, I'm transported back to that warm kitchen filled with the sweet aroma of peppermint and butter, and I understand why she loved this recipe so much.
I baked a batch for my neighbors last December, and one of them came back to ask for the recipe. That's when I knew these weren't just cookies—they were tiny gifts wrapped in holiday magic that actually made people happy.
Ingredients
- Unsalted butter, softened (1 cup): This is your foundation. Softened butter creams properly with sugar to create that light, fluffy base that makes these cookies so tender. Cold butter won't incorporate air, so let it sit on the counter for about 30 minutes first.
- Granulated sugar (1 cup): The sweetness that balances the peppermint extract perfectly. Don't skip the creaming process—it's what gives these cookies their delicate texture.
- Large egg (1): This binds everything together and adds richness. Room temperature eggs mix more smoothly than cold ones.
- Vanilla extract (1 tsp): This rounds out the peppermint flavor, giving it depth instead of letting it taste medicinal.
- Peppermint extract (1/2 tsp): The star ingredient. This is concentrated peppermint flavor, so a little goes a long way. If you use regular vanilla peppermint, you might need more.
- All-purpose flour (2 3/4 cups): Measure by spooning into the cup and leveling off—don't pack it or your cookies will be tough.
- Baking powder (1/2 tsp): A subtle leavening agent that keeps these cookies tender and slightly cakey rather than dense.
- Salt (1/2 tsp): This enhances the peppermint flavor and prevents the cookies from tasting one-dimensional.
- Red food coloring gel: Gel coloring gives you vibrant color without adding moisture like liquid coloring does. Paste or gel will keep your dough at the right consistency.
- Crushed peppermint candies or candy canes (about 1/3 cup, optional): The finishing touch that makes these look festive and adds a little crunch to the outside. Save your candy cane breakage—it's perfect here.
Instructions
- Cream the butter and sugar:
- In a large bowl, beat the softened butter and sugar together for about 2 minutes. You're looking for the mixture to go from grainy and pale to light, fluffy, and almost whipped. This is where the magic happens—you're literally beating air into the butter, which will make your cookies tender and delicate.
- Add the egg and extracts:
- Crack your egg into the creamed mixture and beat it in until you don't see any streaks of yellow. The mixture might look slightly curdled at first—that's normal. Now add the vanilla and peppermint extracts and mix until everything is completely combined and smooth.
- Combine your dry ingredients separately:
- In a smaller bowl, whisk together the flour, baking powder, and salt. Whisking distributes the baking powder evenly, which helps your cookies rise uniformly.
- Bring the dough together gently:
- Slowly add the dry ingredients to the wet mixture, stirring by hand with a wooden spoon or using your mixer on low speed. Stop as soon as you don't see any white streaks of flour. Overmixing develops gluten and will make your cookies tough instead of tender.
- Color half the dough:
- Divide the dough in half. Place one half on parchment paper and add a few drops of red gel coloring. Now comes the fun part—knead the coloring in with your hands until it's evenly distributed and you have a soft pink or red dough. The other half stays plain white for contrast.
- Chill your dough:
- Wrap both portions loosely and refrigerate for at least 1 hour. This is crucial—cold dough is easier to shape and will hold those beautiful twists. I often chill mine for 2 hours or even overnight.
- Get your oven ready:
- Preheat your oven to 350°F and line your baking sheets with parchment paper. This prevents sticking and gives you an even browning on the bottom.
- Shape your cookies:
- This is where these cookies become special. Pinch off a heaping teaspoon of red dough and a teaspoon of white dough. Roll each into a rope about 4 inches long—they should be roughly the same thickness. Now twist them together like you're making a candy cane or spiral. The looser your twist, the more beautiful it looks. If the dough gets too warm and sticky while you're working, pop it back in the fridge for a few minutes.
- Dress them up:
- Place your twisted cookies about 2 inches apart on the prepared baking sheets. If you want that festive sparkle, now's the time to sprinkle crushed peppermint candies on top. I love pressing them in gently so they stick a little.
- Bake until just set:
- Bake for 9 to 11 minutes. You want the edges to be barely golden but the centers should still look slightly underdone. They continue cooking on the hot pan, and you want them to stay tender and a little chewy in the middle.
- Cool with patience:
- Let them sit on the baking sheet for 2 minutes to set, then carefully transfer to a wire rack to cool completely. This prevents them from breaking when you move them while they're still too soft.
 Pin this
 There was one year when my sister's daughter helped me twist the dough together, her tiny hands carefully following my movements. She ate three cookies straight from the cooling rack and announced they were the best thing she'd ever tasted. That moment made me realize these cookies are about so much more than flavor—they're about creating memories with the people you love.
The Peppermint Flavor Balance
The magic of these cookies is in how the peppermint works with the buttery sweetness. The vanilla extract keeps the peppermint from tasting harsh or medicinal—it softens it and makes it feel like you're eating a luxurious candy. If you love peppermint, you can add an extra 1/4 teaspoon of peppermint extract to the dough, but taste as you go because it's potent. I've also experimented with peppermint oil, but extract works best here.
Make-Ahead Magic
One of my favorite things about this recipe is how flexible it is for busy seasons. You can prepare the dough up to a day ahead, wrap it well, and keep it chilled in the refrigerator. When you're ready to bake, just pull it out and let it soften for a few minutes so it's easier to shape. You can also bake these up to three days ahead and store them in an airtight container—they stay soft and fresh. Some people even freeze the baked cookies for a few weeks, which is perfect if you're prepping for holiday parties.
Color and Flavor Variations
While red and white is the classic combination, I've played around with variations that feel special. Green and white is beautiful and feels more modern. You can also make them with both red and green if you want a truly festive look—just divide the dough into thirds instead of halves. If you want to experiment with flavors, try adding a tiny pinch of cinnamon to the dough for a subtle warmth, or stick with pure peppermint if that's what you love. The candy cane decoration is optional but worth doing at least once because it makes them look like you spent hours in a professional bakery.
- Gel coloring creates deeper, more vibrant colors without changing your dough's texture
- Crushed candy canes added before baking are more colorful; crushed ones added after stay crunchier
- If you don't have candy canes, sprinkle with white or red sanding sugar for a different sparkle
 Pin this
 Every year, these cookies become a small tradition in my home, and I hope they become one in yours too. There's something about the combination of festive colors, buttery texture, and that perfect peppermint flavor that makes people smile.
Recipe Questions & Answers
- → How do I achieve the peppermint flavor in these cookies?
-
Incorporate peppermint extract into the dough mixture before combining it with dry ingredients to infuse a refreshing minty taste.
- → How can I create the colorful swirls in the cookies?
-
Divide the dough and tint one portion with red food coloring, then twist ropes of plain and colored dough together to form swirls.
- → What is the best way to chill the dough?
-
Cover the divided dough portions tightly and refrigerate for at least an hour to firm up and enhance texture.
- → Can I add crushed peppermint candies on top?
-
Yes, sprinkling crushed peppermint candies before baking adds extra crunch and a festive aroma.
- → How should I store these cookies after baking?
-
Allow cookies to cool completely on a wire rack, then store them in an airtight container to maintain freshness.
