 Pin this
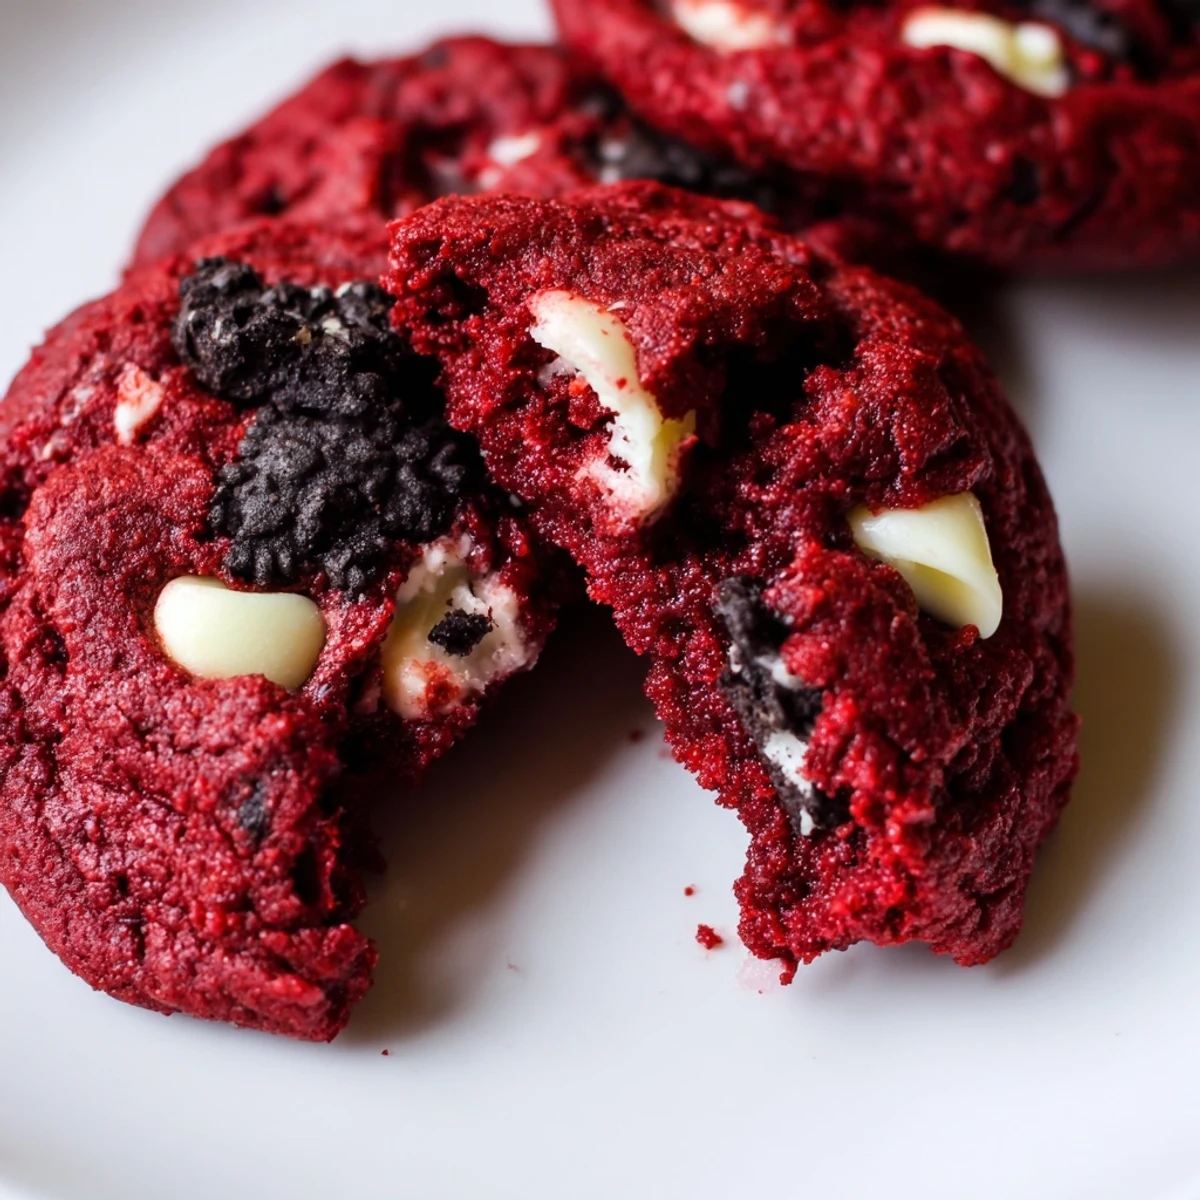
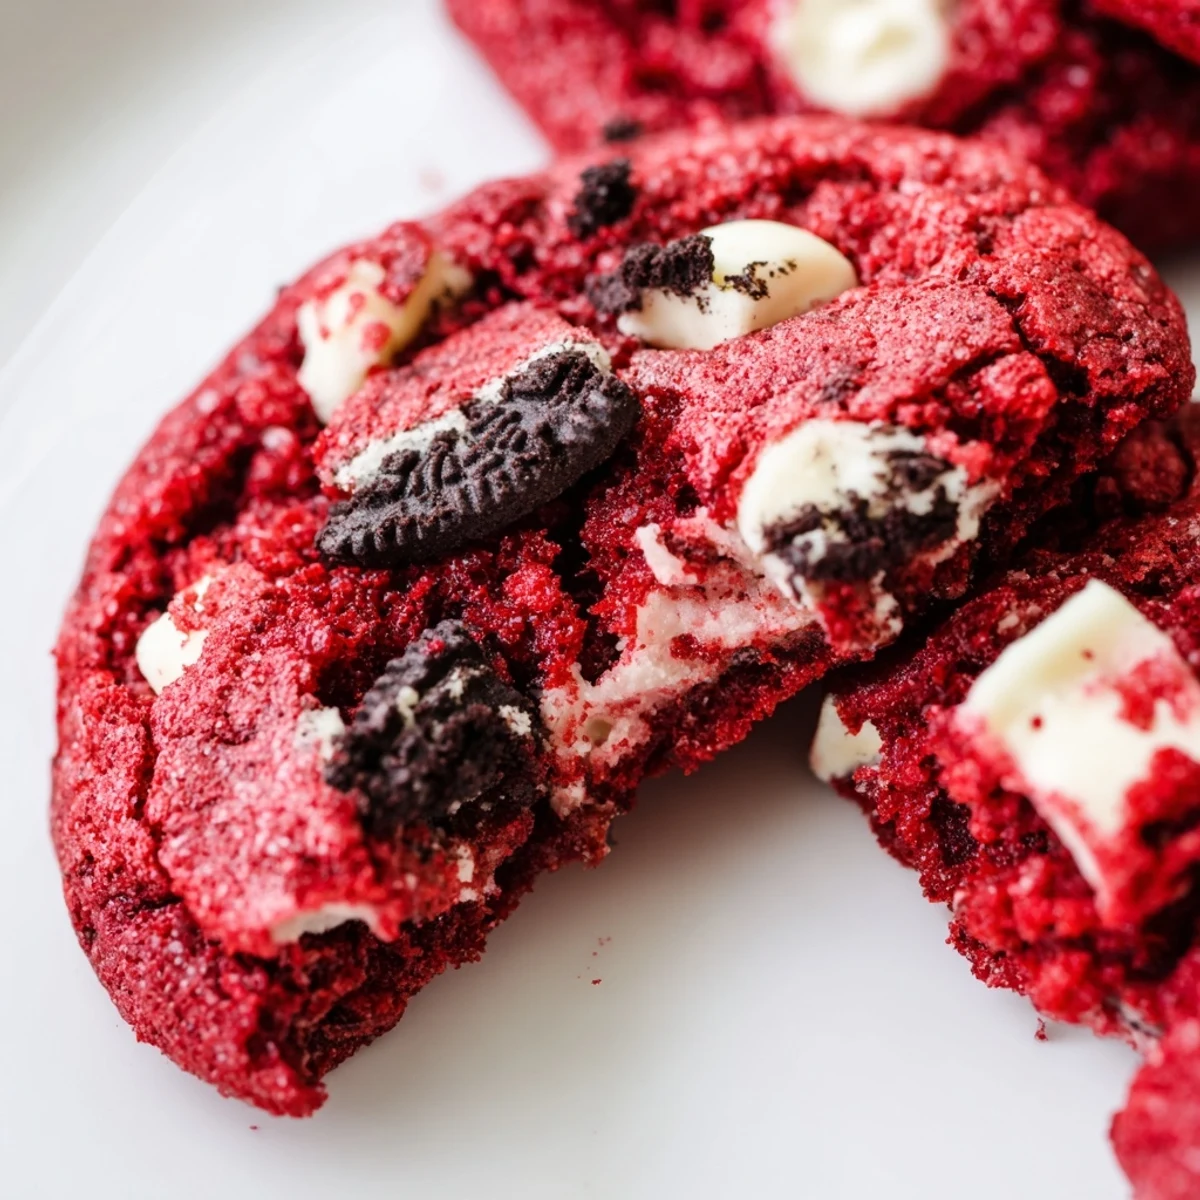
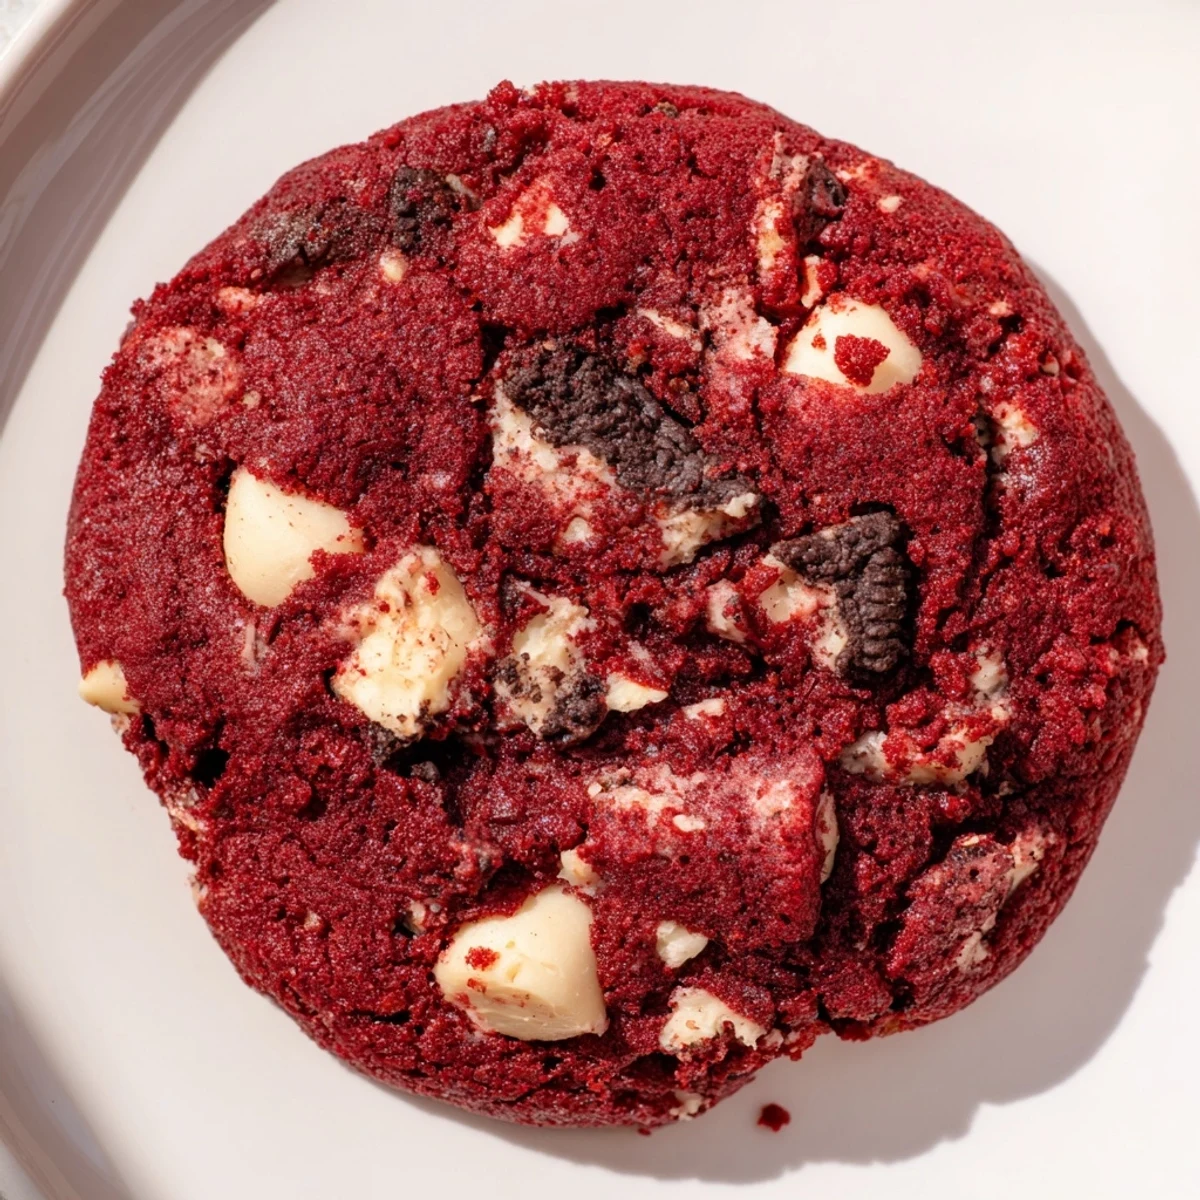
 These soft, chewy red velvet cookies combine the classic cocoa flavor of red velvet with creamy white chocolate and crunchy Oreo pieces. The vibrant red color makes them perfect for holidays, Valentine's Day, or anytime you want a striking dessert.
The dough comes together quickly with softened butter, brown sugar for moisture, and both egg and egg yolk for richness. Gel food coloring delivers that signature deep red hue without altering the texture.
Chopped Oreos folded into the batter create pockets of cookies-and-cream goodness throughout each cookie, while white chocolate chips add sweetness and creaminess that complements the cocoa undertones.
The first time I made these, my kitchen looked like a crime scene with red food coloring everywhere, but one bite of those marbled chocolate cookies made every paper towel worth it. My roommate walked in, eyes wide, and immediately asked what bakery I'd raided. When I told her I'd baked them myself, she refused to believe me until I showed her the empty mixing bowls.
I brought these to a friend's birthday party last winter, and honestly, I think people were more excited about the cookies than the actual cake. The birthday girl took one bite and literally moaned, then proceeded to hide three of them in her purse before anyone else could get seconds. Now every time she sees me, she asks if I've brought 'those red velvet things'.
Ingredients
- All-purpose flour: The backbone of your cookie, providing structure without making these too dense or cakey
- Unsweetened cocoa powder: This gives you that subtle chocolate depth that makes red velvet more than just pretty vanilla
- Baking soda: Your secret weapon for achieving those irresistibly thick, chewy centers
- Salt: Just enough to wake up all the flavors and keep things from tasting one-note sweet
- Unsalted butter: Start with room temperature butter to properly cream those sugars into fluffy perfection
- Light brown sugar: This is what gives you those gorgeous crispy edges while keeping middles soft
- Granulated sugar: Balances the brown sugar and helps create that crackly, bakery-style surface
- Egg plus egg yolk: The extra yolk is a pro trick for maximum chewiness and richness
- Vanilla extract: Pure extract only, please, this is too good a recipe for imitation anything
- Milk: Just enough to bring the dough together and activate that red color
- Red food coloring: Gel coloring gives you that deep red without needing half the bottle
- White chocolate chips: Creamy sweetness that plays so nicely against the cocoa
- Oreo cookies: Roughly chop them yourself so you get those perfect bite-sized crunches throughout
Instructions
- Preheat your kitchen:
- Set your oven to 350°F and line those baking sheets now so you're not scrambling with sticky dough hands later
- Whisk the dry team:
- In a medium bowl, combine your flour, cocoa powder, baking soda, and salt until everything's evenly distributed
- Cream the butter and sugars:
- Beat that butter with both sugars for 2 to 3 minutes until it's pale and fluffy, this is what creates texture
- Add the wet ingredients:
- Pour in your egg, extra yolk, vanilla, milk, and red food coloring, mixing until the color is uniform and gorgeous
- Bring it all together:
- Gradually fold in your dry ingredients, stopping the moment you no longer see visible flour streaks
- The fun part:
- Gently fold in those white chocolate chips and chopped Oreos until they're evenly distributed throughout the dough
- Scoop and space:
- Drop rounded balls onto your prepared sheets, giving them about 2 inches of room to spread into perfect cookies
- Bake to perfection:
- Slide them in for 10 to 12 minutes until edges are set but centers still look slightly underdone
- The patience test:
- Let them rest on the hot baking sheet for exactly 5 minutes before moving them to a wire rack
 Pin this
 These have become my go-to when I need to impress someone without spending all day in the kitchen. There's something magical about watching people's faces when they bite into something that looks so dramatic and tastes even better. Last week, my neighbor brought over a plate of her famous brownies as a trade, and honestly, I think I got the better deal.
Getting That Perfect Red
I learned the hard way that liquid food coloring will throw off your entire dough consistency, turning thick, scoopable dough into a sticky mess that spreads into flat puddles in the oven. Gel coloring is concentrated, so you need less liquid to achieve that signature deep red, and your texture stays perfect every single time.
The Oreo Strategy
Don't just dump whole Oreos into your dough, you'll get awkward bites with massive cookie chunks and others with none at all. I chop mine into irregular pieces, some smaller like pebbles and others closer to marble size, so every cookie has that perfect cookies and cream distribution throughout.
Make-Ahead Magic
Sometimes the best baking happens when you're not actually baking. This dough freezes beautifully, and I love scooping it into balls, freezing them on a tray, then storing them in a ziplock bag for fresh-baked cookies on demand.
- Drop frozen dough balls onto your baking sheet and add just 1 to 2 minutes to your baking time
- Press a few extra Oreo pieces into the tops before baking for that professional bakery look
- Room temperature dough bakes up slightly thinner than chilled, so adjust your expectations accordingly
 Pin this
 These cookies have become my signature for a reason, they're impossible to forget and even harder to stop eating. Hope they become yours too.
Recipe Questions & Answers
- → What makes red velvet cookies different from regular chocolate cookies?
-
Red velvet cookies typically have a milder chocolate flavor than regular chocolate cookies, using less cocoa powder. The signature red color comes from food coloring, and they often include buttermilk or vinegar for a subtle tang. These cookies also tend to be softer and more tender than traditional chocolate chip cookies.
- → Can I use liquid food coloring instead of gel?
-
Yes, you can use liquid food coloring, but you'll need to use more of it to achieve the same vibrant red color. Gel food coloring is more concentrated and won't add extra liquid to your dough, which helps maintain the proper cookie texture. If using liquid, start with 1 teaspoon and add more as needed.
- → How should I store these cookies to keep them soft?
-
Store cooled cookies in an airtight container at room temperature for up to 5 days. Placing a slice of white bread in the container helps maintain moisture and keeps the cookies soft. For longer storage, freeze unbaked dough balls for up to 3 months and bake fresh when needed.
- → Why do the centers look slightly underbaked?
-
Removing cookies when the centers appear slightly underbaked ensures they stay soft and chewy after cooling. The residual heat continues cooking them as they rest on the baking sheet. If baked until completely set, they'll become firm and lose that desirable soft texture.
- → Can I make these without red food coloring?
-
Absolutely! Without food coloring, you'll have delicious chocolate velvet cookies with the same great texture and flavor profile. They'll be a rich brown color instead of red, but the combination of cocoa, white chocolate, and Oreos remains just as tasty.
