 Pin this
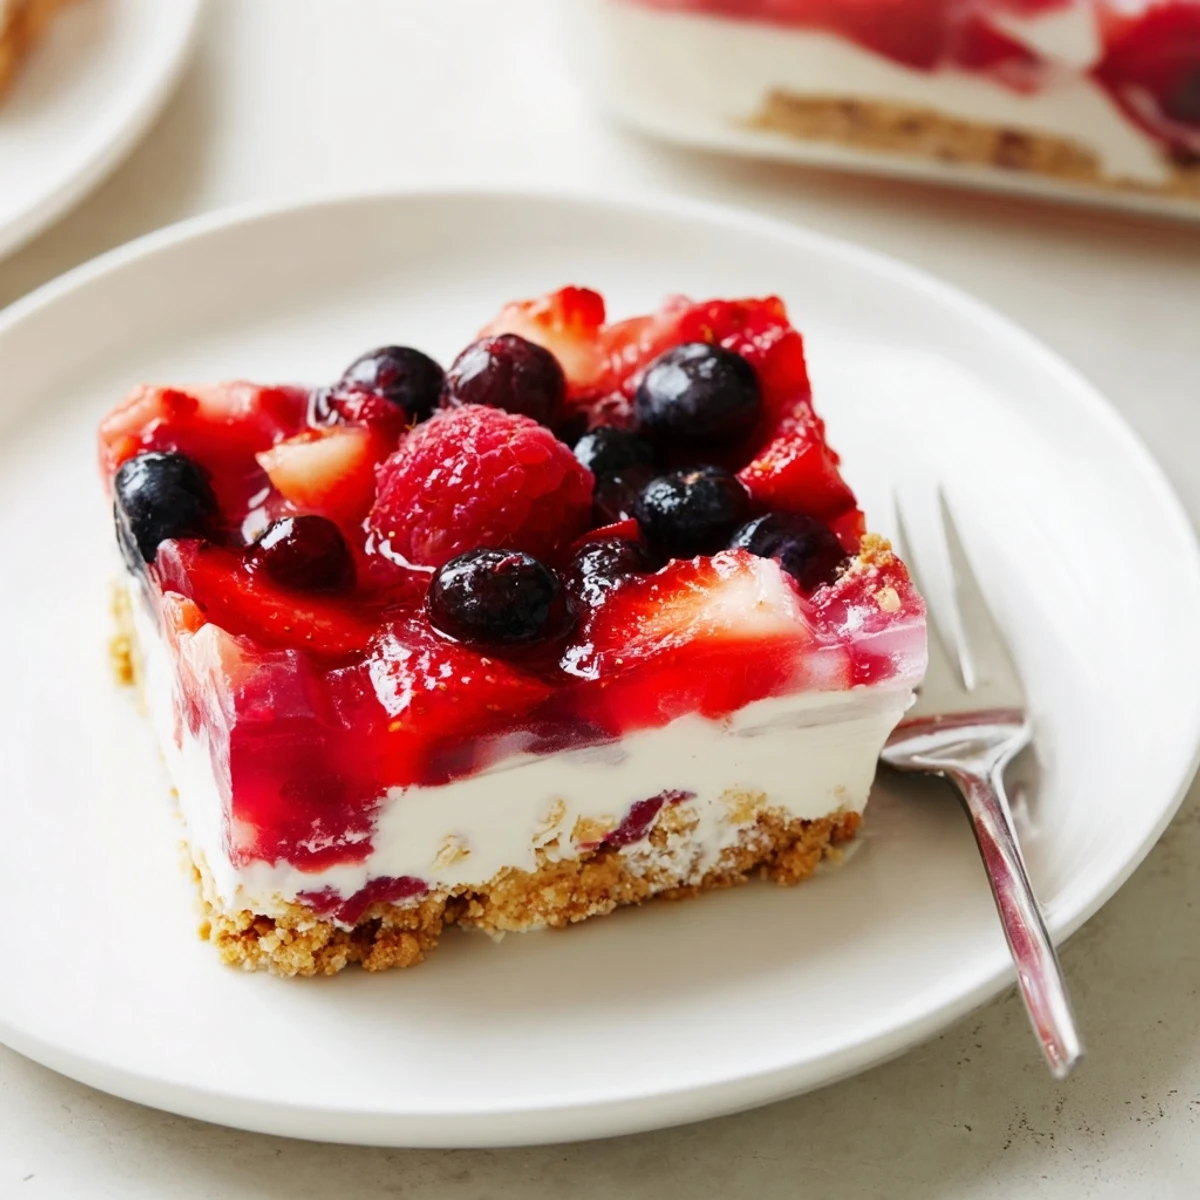
 This no-bake, layered summer dessert starts with a buttery graham crust pressed into a 9x13 dish, followed by a smooth cream cheese and whipped topping filling. Warm gelatin is cooled slightly and folded with fresh berries, then poured over the cream cheese layer. Chill at least 4 hours until set, top with extra whipped cream and berries, then cut into squares for serving. Easy swaps include vanilla wafers for the crust or light dairy for a lighter finish.
Last August, the sound of summer—neighbors laughing, a lawnmower humming lazily—drifted in, but what really caught my attention was the bowl of just-picked berries crowding my countertop. The plan was something wow-worthy yet oven-free, something that convinced even the doubters of jello. Between refrigerator door slams and my sister taste-testing the filling straight from the bowl, this colorful layered lasagna came together more quickly than I imagined. There’s a certain kind of satisfaction in lifting that first perfect square, the layers gleaming in the afternoon light.
One weekend, friends rolled in from the lake sunburned and hungry, and I stumbled on a genius move: let everyone choose their favorite berry for the topping. The kitchen turned into a berry bar, sticky fingers everywhere, and by dessert's end, people were quietly plotting how to sneak leftovers for breakfast. Even my berry-skeptic cousin asked for the recipe on her way out the door. There’s just something about the chilled layers that keeps people circling back for seconds, no matter how full they are.
Ingredients
- Graham cracker crumbs: The classic crust gives just the right balance of crunch and a hint of caramel; I press them pretty firmly for clean layers, but not so much they turn to cement.
- Unsalted butter: It binds the crumbs perfectly—don’t skimp, or the base will crumble when you lift your first square.
- Granulated sugar: Adds a sweet foundation to the crust; I learned a light hand is best here so the cookie flavor shines.
- Cream cheese: Softened well, it transforms into a dreamy middle layer; leaving it out a bit longer than I think always pays off for lump-free blending.
- Powdered sugar: For sweetening and smoothing the filling—once I tried granulated by accident and never made that mistake again.
- Vanilla extract: One teaspoon turns the cream layer from good to irresistible; go for real vanilla if you can.
- Whipped topping: It makes everything light, fluffy, and easy to spread, so don’t overmix when folding it in.
- Strawberry or raspberry gelatin: Use your favorite, but always dissolve it completely so there are no grainy bits.
- Boiling water: Essential for activating the gelatin—watch the steam and keep little ones clear for this step.
- Cold water: Helps gel everything after the heat; if it's ice-cold, cooling is even quicker.
- Mixed fresh summer berries: Go wild—strawberries, raspberries, blueberries or blackberries, just make sure they're dry so the jello sets up properly.
- Extra whipped topping: For a finishing cloud—spread it right before serving if you love height.
- Assorted fresh berries for garnish: The more colorful, the better; whole or sliced, just scatter generously.
Instructions
- Build the Buttery Crust:
- Stir together graham crumbs, melted butter, and sugar in your favorite mixing bowl, inhaling that warm, sweet aroma before pressing it firmly into your baking dish. Pop it in the fridge for a few minutes to set while we whip up the fun parts.
- Whip Up the Cream Cheese Dream:
- Beat the softened cream cheese, powdered sugar, and vanilla until it looks glossy and lump-free (I always sneak a taste to check the sweetness). Gently fold in whipped topping, then spread this fluffy goodness over the chilled crust without pressing too hard.
- Stir the Berry Jello Magic:
- Dissolve your gelatin in boiling water—stir until not a single crystal is left—then add cold water and let it cool so it doesn't melt the creamy layer. Fold in your chosen berries, then carefully pour the mixture over the cream cheese, taking it slow to avoid messy swirls.
- Let Layers Set and Finish:
- Once you see the jello is set and gives a gentle wobble, slather on more whipped topping for that signature snowy finish. Just before serving, scatter a confetti of fresh berries on top and cut generous squares for everyone.
 Pin this
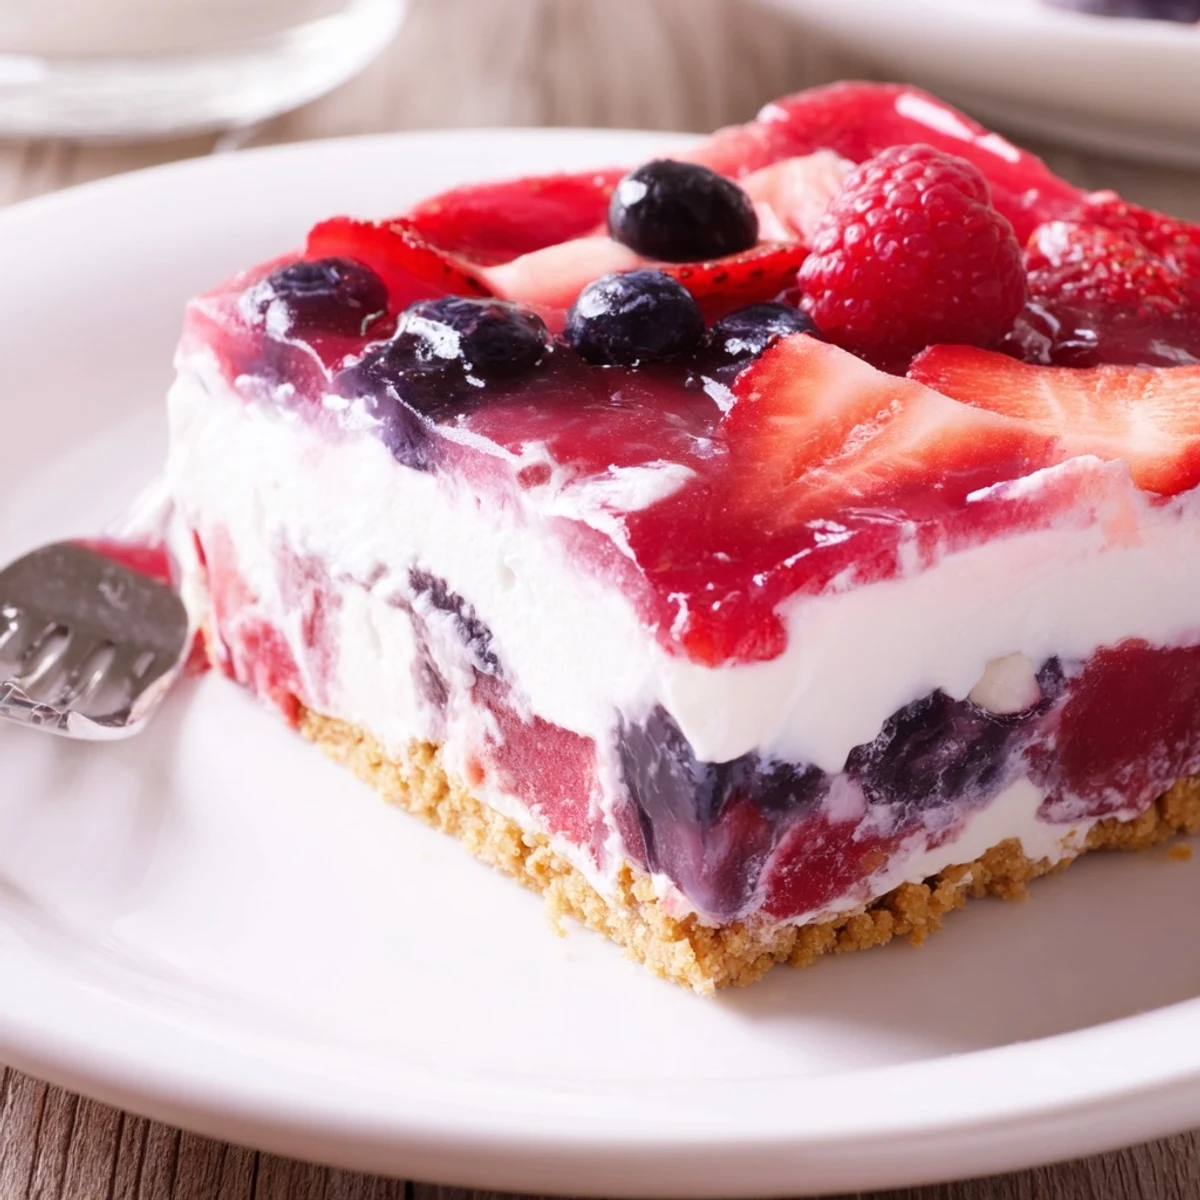
 One early summer evening, this was the highlight of my impromptu backyard dinner—a neighbor I barely knew leaned across the fence and asked for a plate, and we ended up swapping childhood dessert stories until sunset. There’s something about passing a chilled, jewel-toned square on a warm night that turns dessert into an event. It felt like summer in every bite.
Beat the Heat with Make-Ahead Magic
I’ve learned this dessert is a lifesaver for those days when the forecast screams triple digits and you refuse to turn on the oven. Prepping it the night before means all the flavors have time to mingle, and you get a refreshing slice straight from the fridge when guests arrive. If you cut it while it’s still a bit chilled but not frozen, the layers hold perfectly and the squares come out picture-perfect.
Swapping Berries for the Season
One winter, I made this with store-bought frozen berries after a wild weather snap ruined the summer pickings, and it still disappeared at the holiday table. If you’re using frozen berries, dry them well after thawing so the jello will set without any extra liquid sneaking in. Changing up the berries always keeps this recipe feeling brand new every time you make it.
Serving Moments that Sparkle
This is one of those desserts that draws people to the kitchen before dinner’s even on the table—the color alone starts conversations every time. I like to scoop generous portions for potlucks but slice neater squares when company’s over for brunch. The fresh berry garnish always gets a sprinkle of laughter as everyone debates which fruit is best.
- If you're feeling fancy, dust a little powdered sugar right before serving for extra sparkle.
- Bring a sharp knife and wipe between cuts to keep those layers bold and clean.
- Don’t forget to chill your serving plates for a cool delivery on a hot day.
 Pin this
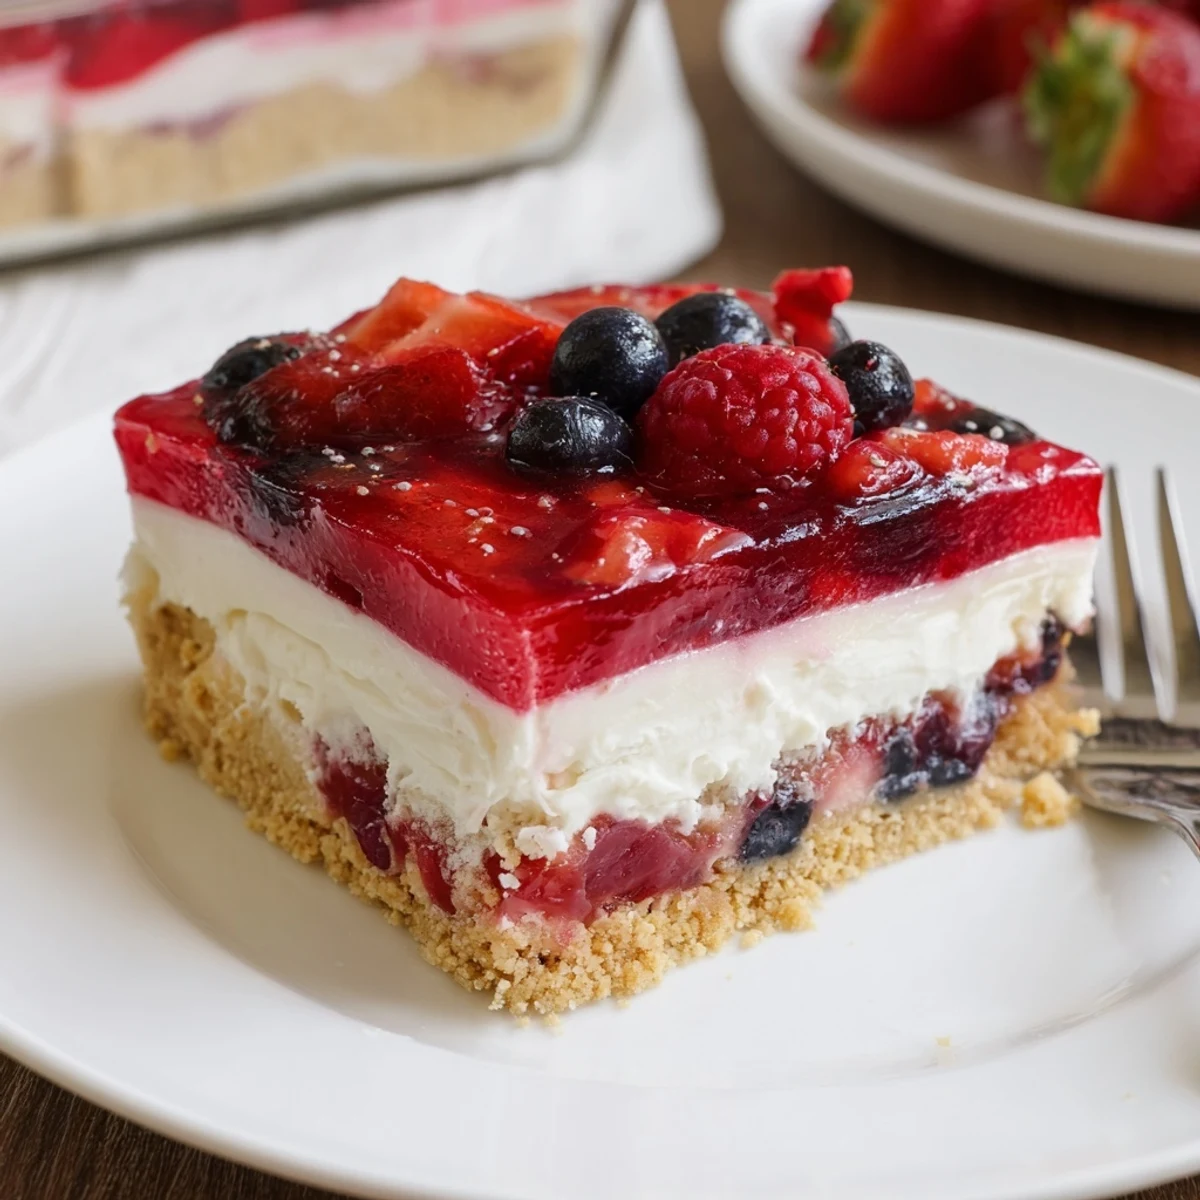
 No matter where you serve this jello lasagna, expect a little wide-eyed delight—there’s just something dazzling about those cool, colorful layers. Here’s to summer’s sweetest moments on every plate.
Recipe Questions & Answers
- → How do I keep berries from sinking in the jello layer?
-
Allow the gelatin to cool to just above room temperature before folding in berries so it’s still pourable but not hot. Gently fold to coat berries, and spread slowly over the cream cheese layer to minimize movement.
- → Can I use frozen berries for the jello layer?
-
Thaw and drain frozen berries thoroughly before folding them into the gelatin to avoid excess liquid that can make the jello runny or prevent proper setting.
- → How long should I chill this layered dessert?
-
Refrigerate for at least 4 hours to ensure the gelatin sets firmly; overnight chilling yields cleaner slices and a better-set texture for serving at gatherings.
- → What are good substitutions for the crust?
-
Swap graham crackers for vanilla wafers or digestive biscuits for a different flavor profile. Press crumbs tightly with the back of a spoon or measuring cup for a compact base.
- → How should I store leftovers and how long do they keep?
-
Cover the dish loosely with plastic wrap or transfer squares to an airtight container and refrigerate. Consume within 2–3 days for best texture and freshness.
- → Are there dairy-free or gluten-free options?
-
Use gluten-free cookie crumbs for the crust and a dairy-free cream alternative in place of cream cheese and whipped topping. Textures may be slightly lighter, so chill thoroughly before serving.
- → Tips for slicing clean squares?
-
Use a thin, sharp knife dipped in hot water and wiped dry between cuts. Chill well before slicing and clean the knife frequently for neat edges.
